
The following steps will allow you to create an Auto Attendant (aka IVR or Interactive Voice Response)
Example Script
“Thank you for calling Prysm Demo Company. If you know the extension you’d like to reach you may dial it at any time. For accounting, press 1. For sales, press 2. For support, press 3. To hear our company directory press 9. Otherwise please stay on the line and you will be connected with an operator.”
Create Auto Attendant
- Using any web browser log into your Manager Portal.

- From the top navigation click on Auto Attendants
- Click on Add Attedant

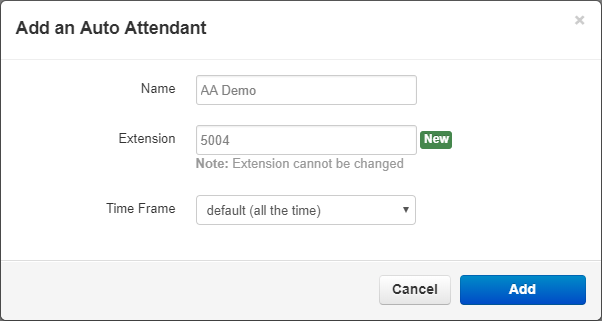
- In the popup fill out the following information:
- Name: Enter any descriptive name. Best practice is to prefix your name with AA.
- Extension: Enter any unsaved extension number from 9501 to 9599 as per Reserved Number Space guide. You will see a green or red icon telling you if the extension number is available.
- Time Frame: Choose you time frame. Best practice is to select default (all the time) and use the Call Routing user or Time of Day routing to route based on time.
- Click Add
Create Auto Attendant Recording
The first step after creating an Auto Attendant is to edit the main audio of the menu prompt.
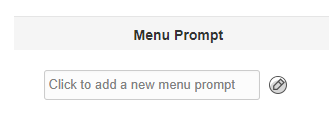
- Click the pencil icon next to Menu Prompt
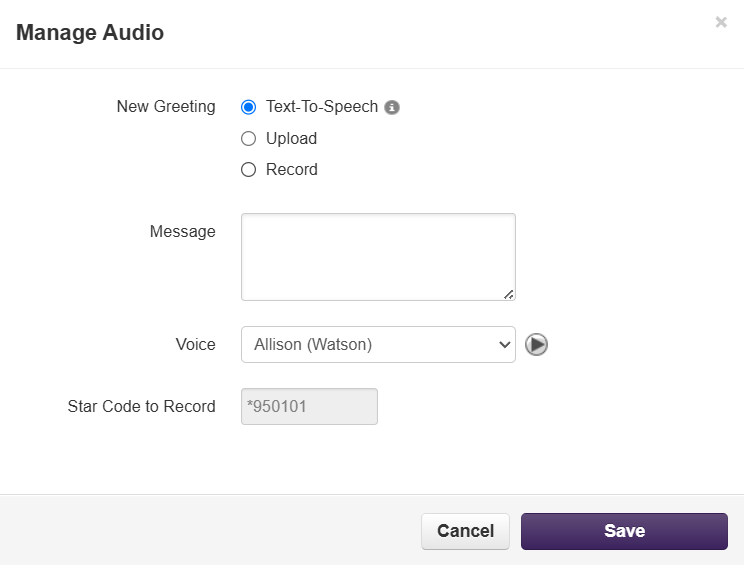
- You may choose to add or edit a greeting through Text-To-Speech, Upload, or Record
- Text-To-Speech: Type your message into the box and select your desired voice from the dropdown menu. It’s easiest to only use a few words to begin with, click the play button beside the voice, and confirm your voice selection. Then you may enter the entirety of the message and hit Save.
- Upload: You may upload a digital MP3 or WAV file by browsing your computer.
- Record: The system will call you at your entered extension. Optionally you can dial the star code from any registered phone within your domain to manage the greeting. Notice the start code is specific to the extension of the Auto Attendant and the message slot. For example, *950101 is extension 9501 message slot 01.
Select Auto Attendant Options
Next you will want to configure your Auto Attendant options. You will see an icon for each of the options a user may dial. To configure these options, click on the respective icon and select one of the following:
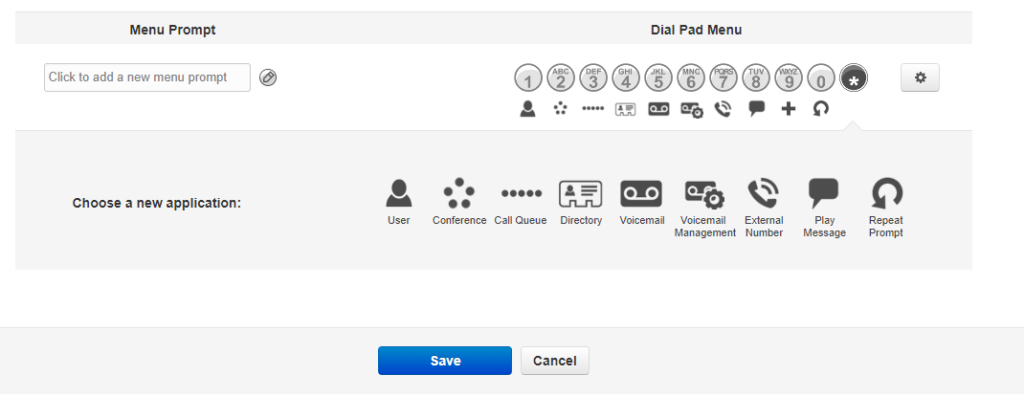
- User: Transfer call to any user or extension.
- Conference: Transfer call to any conference bridge.
- Call Queue: Transfer call to any call queue.
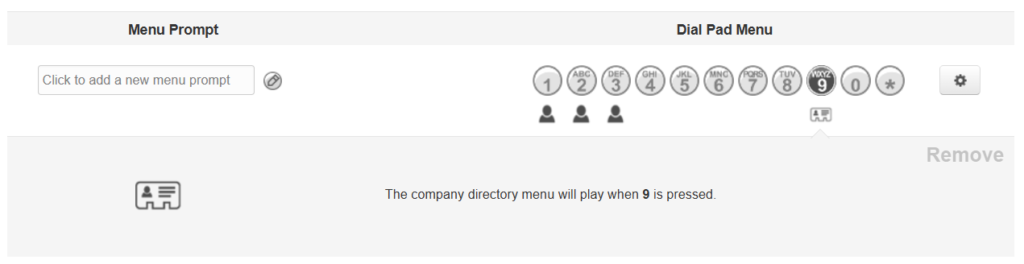
- Directory: Plays a company directory with dial by name. Any users that have the “List Directory” option will be listed here.
- Voicemail: Sends call directly to a user’s voicemail box. (Do not use “Enable Enhanced Voicemail”)
- Voicemail Management: Allows caller to access any user’s voicemail and change administrative options. Requires extension number and password for access.
- External Number: Enter 10 digit number of cell or landline.
- Play Message: Plays a recorded message, then gives you the option to transfer the caller.
- Repeat Prompt: Repeats Menu Prompt
- Add Tier: Adds another level of Auto Attendant menus
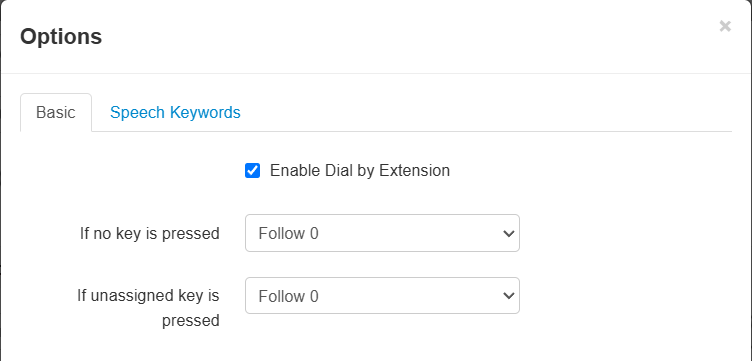
- Options: Additional options. You must have the number options set and saved before setting these.
- Dial by Extension: Allow dial by extension or not.
- In no key pressed: Option to follow if no key is pressed.
- If unassigned key pressed: Option to follow if a wrong key is pressed.
Select your options and click the Save button
Example Configuration
Script: “Thank you for calling Prysm Demo Company. if you know the extension you’d like to reach you may dial it at any time. For accounting, press 1. For sales, press 2. For support, press 3. To hear our company directory press 9. Otherwise please stay on the line and you will be connected with an operator.”
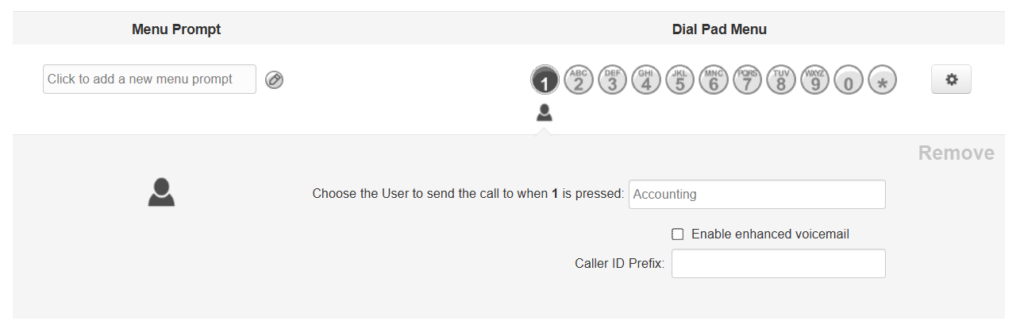
- Option 1: Select User and select extension for Accounting
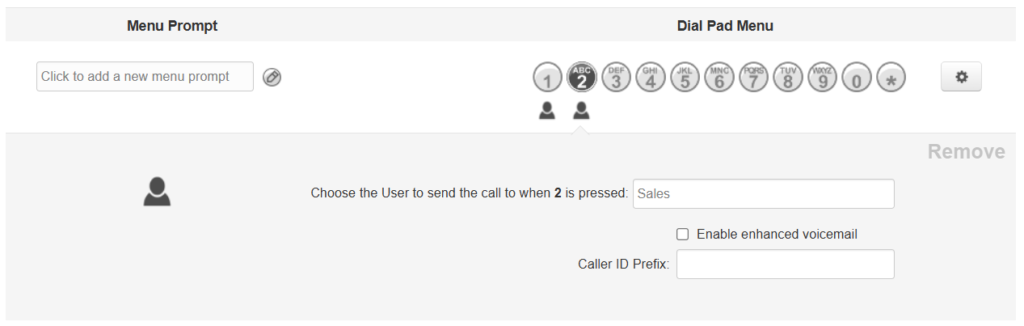
- Option 2: Select User and select extension for Sales
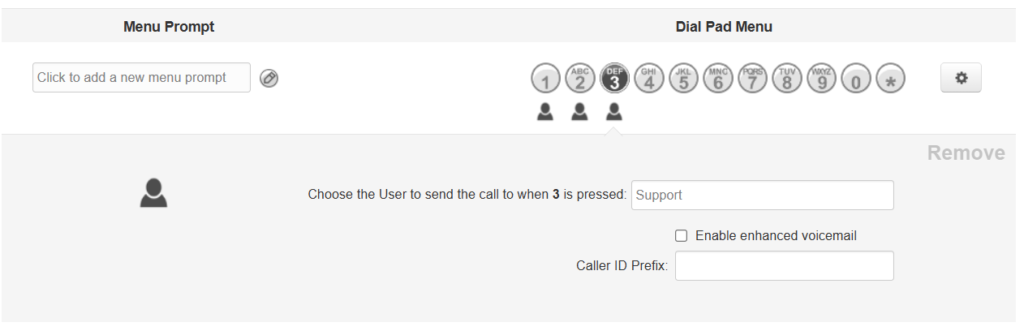
- Option 3: Select User and select extension for Support
- Option 9: Select Directory
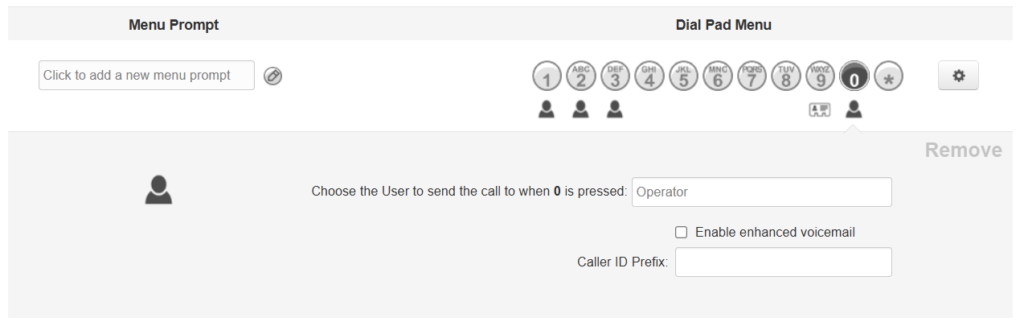
- Option 0: Select User and select extension for Operator
- Click Options
- Enable Dial by extension
- Set remaining options to follow option 9
- Click Done
Conclusion
You may now set your call routing user to send calls to your Auto Attendant per this guide.